During the past few weeks we have reviewed agitated saline ‘echo bubble studies’. Our guest writers Dr. Ali and Dr. Nossikoff have explained what an agitated saline “Echo Bubble study” is, along with indications, how to perform and interpret a bubble study, supplies needed and the safety of bubble studies. This week we will review 6 tips for improving the quality of an echo bubble study including the best echo window based on pathology.
If you missed our recent blogs on agitated saline ‘bubble studies’ check them out here:
- 7 Indications for an Echo Bubble Study
- 9 Steps to Perform an Echo Bubble Study
- Educator Spotlight: Dr. Ahmed Ali
- Educator Spotlight: Dr. Alexander Nossikoff
By now you should know the basics to performing an echo bubble study. This week we would like to share some tips to improve image quality during an echo bubble study.
1. OPTIMIZE YOUR IMAGE
Get the best possible image by:
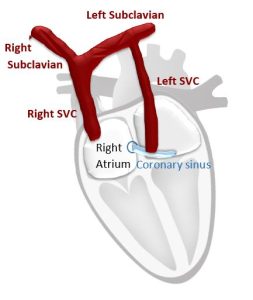
- Depending on the indication decide the best view for imaging. See table above and review last week’s article for detailed imaging and interpretation techniques based on specific indication
- Using the highest transducer frequency that doesn’t impair beam penetration.
- Adjusting the dynamic range, image compression and reject so that the micro-bubbles will be easier to identify
- Using colorized 2D images may help visual contrasting the micro bubbles from the endocardium.

2. LONGER LOOP ACQUISITION
Use very long loop acquisition of up to 20 cycles, starting before the Valsalva release and/or agitated saline entering RA.
3. MULTIPLE WINDOWS
Use multiple imaging views with apical 4 chamber and subcostal 4 chamber if A4C was not so good. The distal shadowing with higher contrast concentrations can obscure the left cavities in subcostal view, hence most operators prefer A4C view. Parasternal views (both long and short axis) can be used as well.
4. VIGOROUSLY AGITATE SALINE
The saline should be agitated vigorously before injection to create properly sized bubbles, pushing the last 2 mls left in a forceful manner to the other syringe and then instantly injecting is of paramount importance. Consider adding blood and gelofusine to have better quality of opacification.
5. FAST AND FORCEFUL!
Rapid and forceful injection of the agitated saline after vigorous agitation create dense and clear micro-bubbles. Raising the patient’s arm with the cannula and/or squeezing the forearm immediately after the injection do improve the micro-bubbles motion toward right atrium.
6. DIMINISH AIR ENTERING CIRCULATION
A very simple safety tip for diminishing the amount of air entering the circulation can be used when performing agitated saline injections – bend the syringe tip down and the plunger up during injection (this is particularly easy when using extension tube), this way the air will stay up near the plunger, stop the injection when close to the last 2ml.
SUMMARY
In conclusion; agitated saline is a cheap, safe and easy to perform technique with lots of added information when properly used. We would like to thank our guest writers this week.
Check out all bubble study blogs:
- 7 Indications for an Echo Bubble Study
- 9 Steps to Perform an Echo Bubble Study
- Educator Spotlight: Dr. Ahmed Ali
- Educator Spotlight: Dr. Alexander Nossikoff


If you are interested in being a guest writer, please contact us


